Emails
Once you’re using order statuses to manage your orders, you can optionally choose to send emails when an order moves into a particular status.
For example, you might create an email called “Customer Order Confirmation” which emails a completed order summary to the customer. This would be linked to the default order status since we want it to trigger when the cart’s completed and becomes an order.
Another email could be “Admin Order Notification”, also attached to the default order status. Instead of being sent to the customer, however, it could go to the store owner’s email address and include stock or packing information.
The store manager can also send any email manually from an order’s edit page, whether that’s to re-send an email tied to a status change or to send an email that’s unrelated to any specific status at all.
# Settings
Before setting up emails for Craft Commerce, ensure that your Craft CMS installation is properly configured for email delivery (opens new window). You can set up your email gateway in the control panel by navigating to Settings → Email.
Commerce emails are sent in Craft queue jobs, so sending may be delayed depending on how your queue is configured to run. See the runQueueAutomatically config setting and notes.
By default, Commerce will send messages using Craft’s “System Email Address” and “Sender Name” found in Settings → Email Settings in the control panel. If you’d like to override this and provide your own from name/address, navigate to Commerce → System Settings → General Settings and enter your own “Status Email Address” and “From Name”.
# Creating an Email
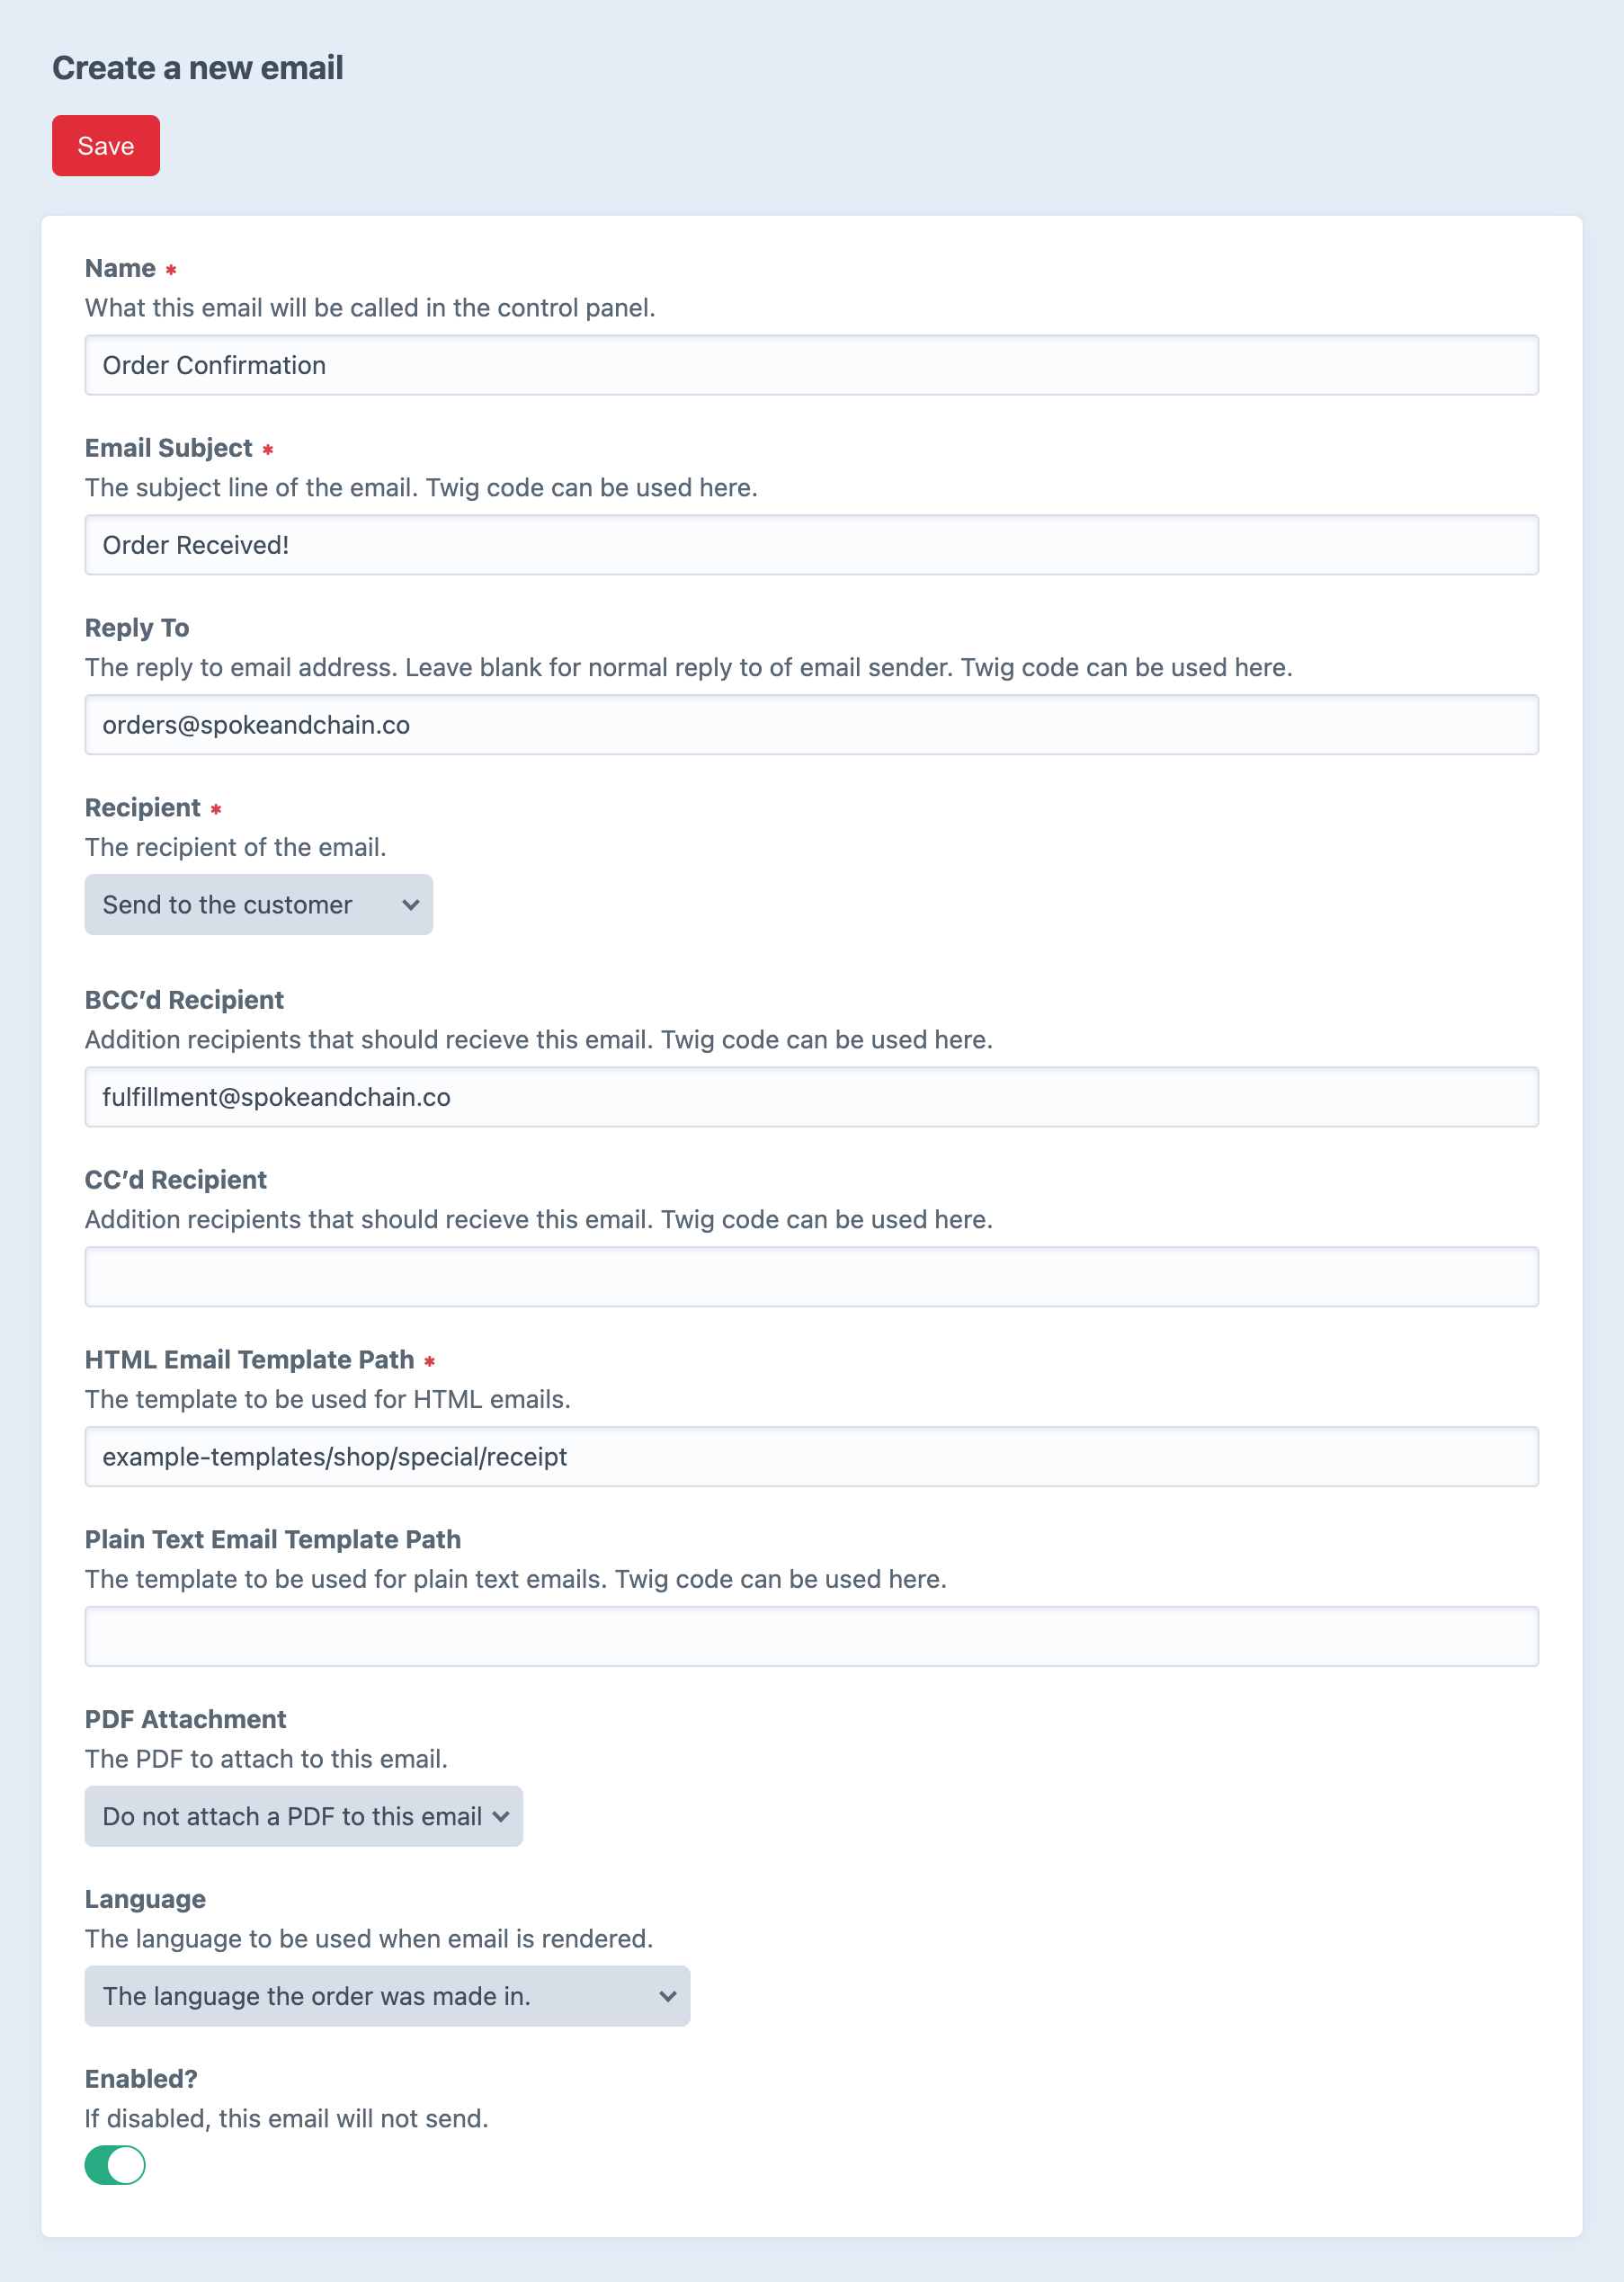
To create a new email, navigate to Commerce → System Settings → Emails, and choose New Email:
Emails have the following configuration settings:
# Name
Enter the name of this email as it will be shown when managing it in the control panel.
# Email Subject
The subject of the email, which can be plain text or use Twig to set dynamic values. Two special variables are available:
orderis a populated Order object (opens new window).orderHistoryis a populated OrderHistory object (opens new window).
order is the cart or order relevant to the notification. The “Email Subject” we enter, for example, might be:
Order #{{ order.id }} received.
# Recipient
The “To” address or addresses for this email.
If “Send to the customer” is selected, the email will only be sent to the order’s customer in the language (locale) that customer used placing the order. This affects the use of the |t filter in other email fields that support Twig.
If “Send to custom recipient” is selected, an email address can be entered. The language of this email will be in the language of whatever user triggers the status change.
Like the Email Subject, this field takes plain text as well as Twig values. Two special variables are available:
orderis a populated Order object (opens new window).orderHistoryis a populated OrderHistory object (opens new window).
order is the cart or order relevant to the notification. The “Recipient” we enter, for example, might be:
{{ order.email }}
This would send the email to the customer that created this order.
# Reply-To Address
The Reply-To address for this email.
This field takes plain text as well as Twig values. Two special variables are available:
orderis a populated Order object (opens new window).orderHistoryis a populated OrderHistory object (opens new window).
# BCC’d Recipient
The BCC addresses for this email. Most likely, you would BCC the store owner on order confirmation.
Separate multiple addresses with a comma (,).
This field takes plain text as well as Twig values. Two special variables are available:
orderis a populated Order object (opens new window).orderHistoryis a populated OrderHistory object (opens new window).
# CC’d Recipient
The CC addresses for this email. Separate multiple addresses with a comma (,).
This field takes plain text as well as Twig values. Two special variables are available:
orderis a populated Order object (opens new window).orderHistoryis a populated OrderHistory object (opens new window).
# HTML Email Template Path
The path to an HTML template in your site’s templates/ folder.
This field takes plain text as well as Twig values. Two special variables are available:
orderis a populated Order object (opens new window).orderHistoryis a populated OrderHistory object (opens new window).
This allows you to have full design flexibility.
# Plain Text Email Template Path
The path to a plain text template in your site’s templates/ folder.
This works the same way as the “HTML Email Template Path”.
# PDF Attachment
Choose a PDF that will be attached to this email.
# Selecting an Email
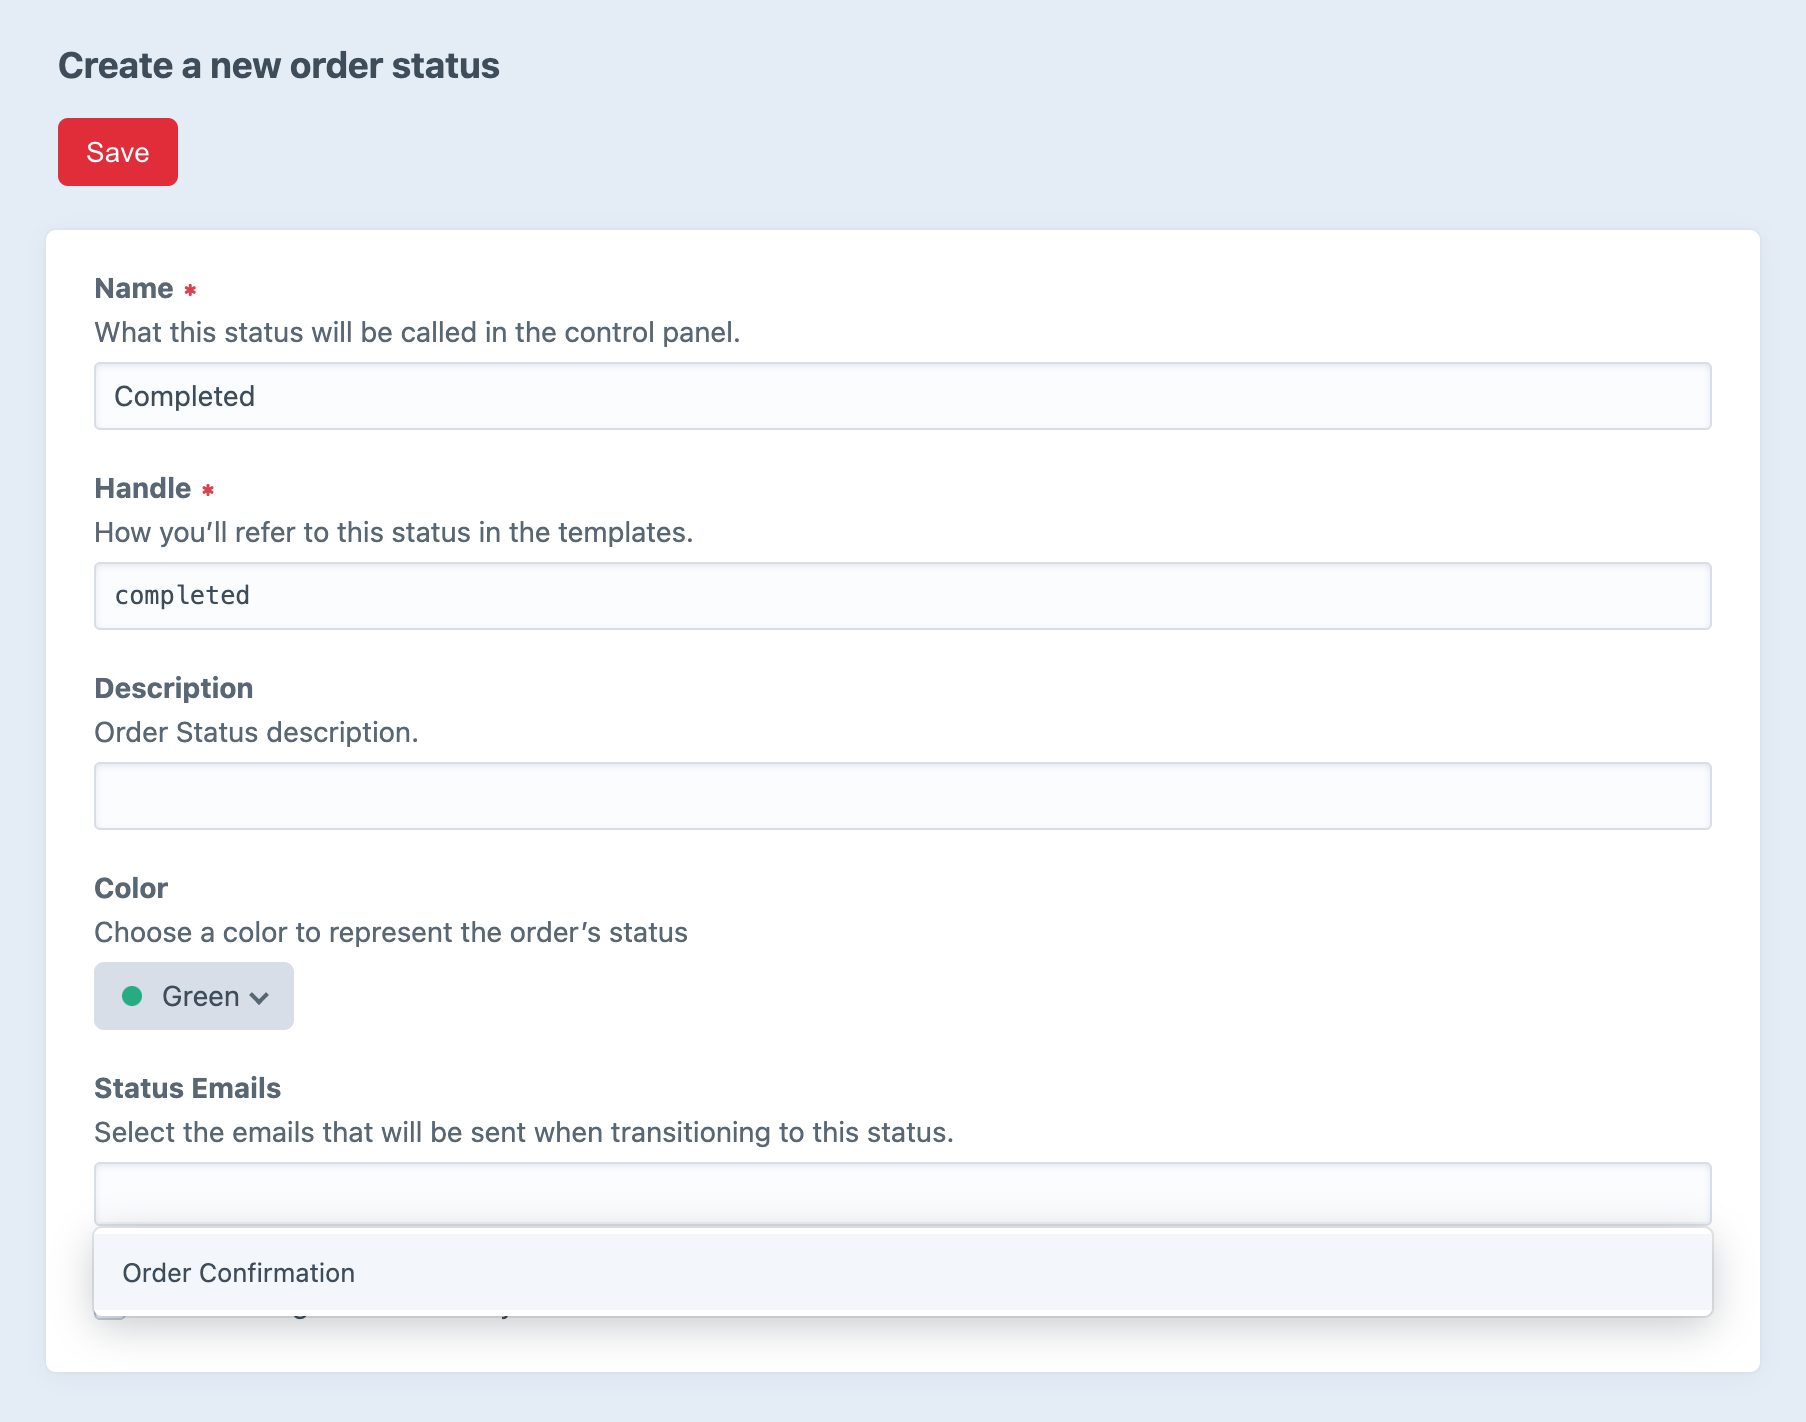
To use the email you’ve created, visit Commerce → System Settings → Order Status and choose the Order Status that should send this email when it updates.
Select the email by name in the Status Emails field. You can select as many emails as you’d like for any given Order Status.

Once you choose Save, the designated emails will be sent when an order is assigned that status.
# Suppressing Emails
There may be cases where you don’t want an order status change to send an email.
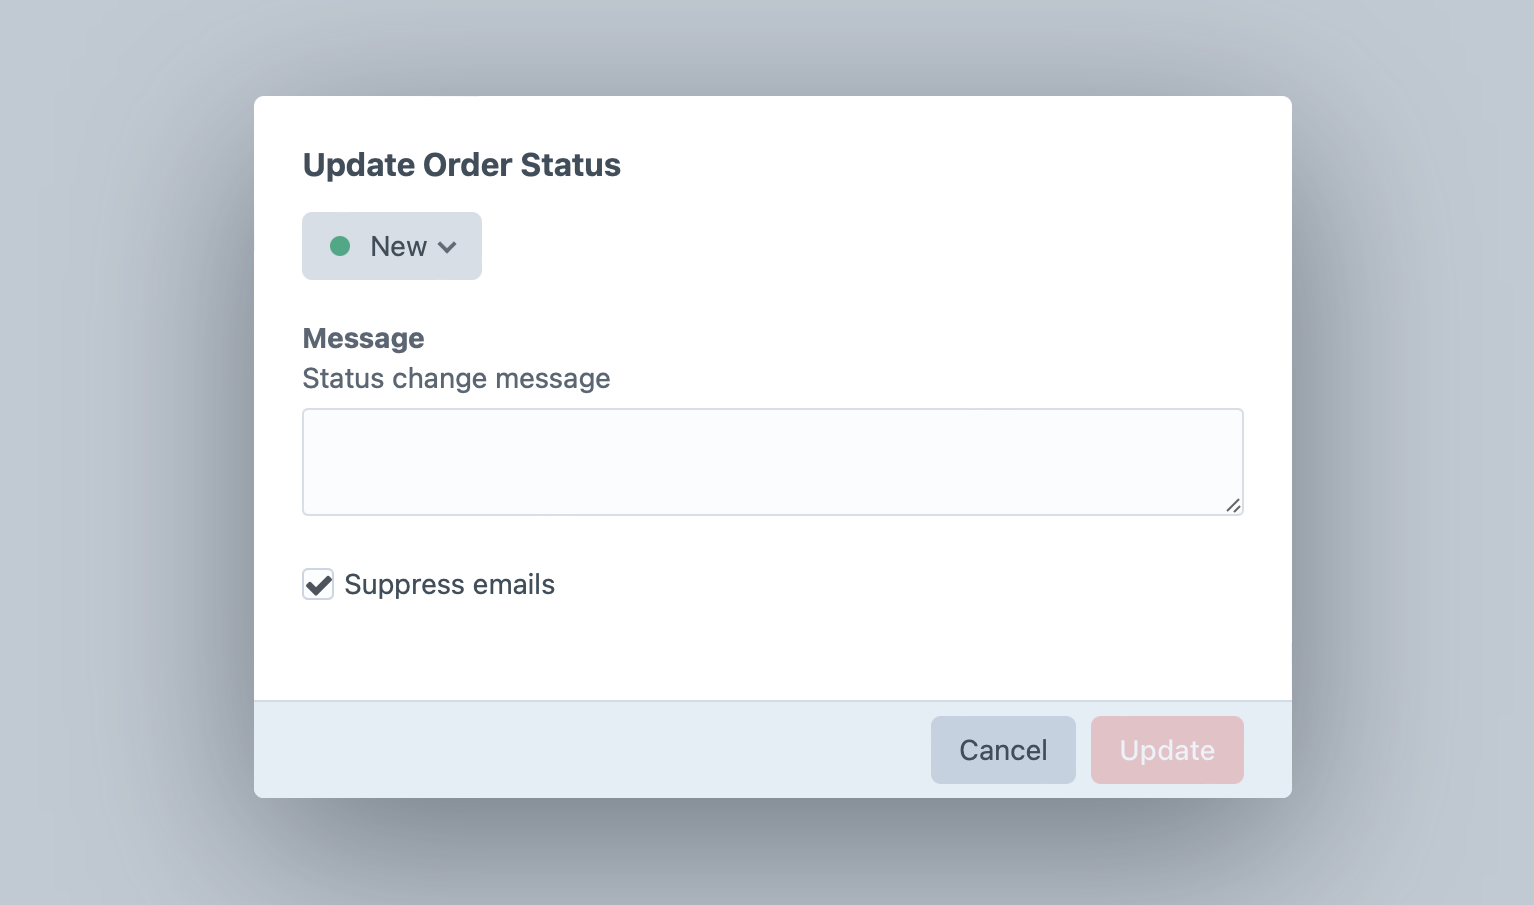
Orders have a memory-only suppressEmails (opens new window) attribute you can set to true to avoid sending email for anything that happens in that request. This is what the “Suppress email” options set when changing status from the order listing or edit views.

Any time an order status email is prepared, Commerce triggers a cancelable event. Set the event object’s $isValid proprty to false to prevent a status change email from being sent:
use craft\commerce\events\OrderStatusEmailsEvent;
use craft\commerce\services\OrderStatuses;
use yii\base\Event;

Event::on(
    OrderStatuses::class,
    OrderStatuses::EVENT_ORDER_STATUS_CHANGE_EMAILS,
    function (OrderStatusEmailsEvent $event) {
        // Prevent sending an order status email
        $event->isValid = false;
    }
);
# Troubleshooting
It’s a good idea to always test your status email templates before relying on them in production.
Once you’ve configured a template, the quickest way to test it is by navigating to Commerce → System Settings → Emails and choosing Preview next to the relevant email. This will open a new tab/window to display the template rendered using a random completed order.
You can add &number=ORDER_NUMBER to the preview URL to use a specific number. Replace ORDER_NUMBER with the order number you’d like to preview.
If your template is rendering successfully but messages are failing to send, you’ll want to check these things in order:
- Make sure Craft’s queue is running.
If therunQueueAutomaticallysetting istrueyou may want to establish a more reliable queue worker. - Make sure any dynamic settings are parsed properly.
Some email settings support dynamic Twig values, where parsing errors can cause sending to fail:- Email Subject
- Reply To
- Recipient
- BCC’d Recipient
- CC’d Recipient
- HTML Email Template Path
- Plain Text Email Template Path
- Make sure the HTML and Plain Text template paths exist and parse properly.
Syntax issues, undeclared variables, or missing information may prevent templates from rendering. - Make sure included PDFs render properly.
If you’re including a PDF, it could have its own rendering issues that cause sending to fail. Be sure to preview the relevant PDF separately and ensure it’s working as expected. - Avoid cart and session references.
Emails are sent by queue processes that don’t have access to cookies or sessions the cart depends on. References tocraft.commerce.carts.cartorcraft.commerce.customers.customer, for example, will result in session-related errors.
Commerce adds email jobs to the queue with high priority for drivers that support it. This helps ensure outgoing messages don’t get stuck behind slow, long-running tasks.
When an email fails to send in response to a status change, its queue job will be marked as failed and include an appropriate message. Once you fix the cause of the sending failure, you can retry sending the email from the queue via Utilities → Queue Manager.
If a plugin suppresses an email (by listening to EVENT_BEFORE_SEND_MAIL and assigning $event->isValid to false), queue jobs will complete normally.
